Showing posts with label Betty. Show all posts

Wednesday, July 20, 2016

Eulogy For A Good Dog


Everyone thinks they have the best dog. And none of them are wrong. 
~W.R. Purche 


Betty was the first puppy I ever lived with or "had." I was also relatively new to being a dog (step)mom, only having lived with Olive for a few months. Oh, my goodness what a good big sister Olive was to Betty who certainly must have tried her patience. I think it is not only the people who were worse off without Olive when we lost her just a few weeks after Betty's first birthday, but Betty would have benefited so, so much had she had more time learning how to be a dog from an expert dog like Olive.


The dogs required us to put Ella the Cat's food on the counter. Ella was getting older so we put a stool near the counter for her to use to get up there. Betty learned that she could also use the stool to get up there, so the stool moved away from the counter, but close enough Ella could jump. A few times we would walk into the kitchen to find Betty on her "shame stool"!
Betty was super snugly from the time we brought her home until she got sick this spring.


Betty may have been inexpert at certain aspects of dogging, but I sure learned a lot from her. I learned patience and persistence - the former because of her skill at the latter. She could tell you again and again and again and again that you should kick this pine cone or ball for her to chase, each time as though she hadn't just asked/demanded. Sometimes I could wait her out, often not. She was passionate about her hobbies!


Grandma gave the Beastie Grrrlz large Chuck-its for Christmas 2015. I thought maybe this would mean Betty's fetch sessions would only require 2 balls - one to carry and one to chase - but, nope... she could still carry two of the big ones!


I learned about the joy in repetition and in the little things. Every time a pine cone was kicked it was a thrill to block it or chase it or pounce on it. EVERY. TIME. Of course, the same goes for fetching balls. Betty was a ball chasing maestra and a pleasure to watch run after them. She was so fast on her long, muscular legs that people would ask if she was part greyhound when we lived in Portland and went to the dog park every day.


Betty learned to be a water dog at the Thousand Acres park at the Sandy River Delta.


Sometimes a stick isn't enough, but to a dog their people are good enough even when they're filthy from remodeling a kitchen.

When she and Delia decided they could not stand each other, I learned about loving someone so much and so hard that I had no choice but to accept a catastrophic flaw.


I re-learned to be ready for the fun and funny unexpected things. Betty did not howl or bay really. This is the only time we can remember her doing it and we were just lucky that I happened to be filming the play session when it happened.


I learned that a nap with a dog was one of the best naps one could nap. I relearned how it was nice to hold hands on car rides. I learned it is just as much fun to make costumes for dogs as it is for people, in fact maybe it is more fun.


Captain Betty. This post on craftster.org got this project published in a Star Trek craft book - no doubt because of Betty's elegant good looks as the model.

So prim.

I never got a good photo of her in her completed hobo spider costume.

Luchadog! La Cazadora, The Huntress

I picked up this elf outfit for Betty at the after holiday clearance. I am glad I got a photo then.

I learned more about sharing and more about the joy in watching others that I love in the acts of
loving each other.

A snap Betty's Auntie Adrienne took of Betty with her cousin/best friend Wacho and her people-cousin, Kate playing in their yard.


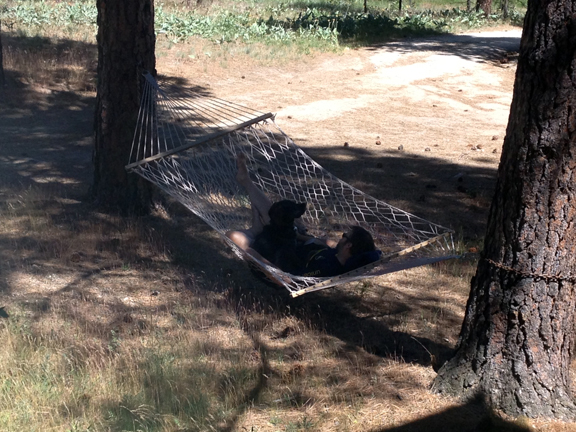
Getting up in that hammock with Eric was her idea and she managed it all on her own.

I have so many photos of Betty throwing herself at guests, but can't seem to find most of them. :(

Fathers Day 2016 walk in the National Forest.

I have already known the sorrow and deep pain of loss from pets dying and now I am learning it again. I love Betty. I miss her.


Tuesday, May 10, 2016

One Step at a Time: Kitchen Edition, The List Shrinks and The List Grows

I had thought I'd be done by the end of April. If the hinge screws would have arrived in a reasonable amount of time and we didn't keep adding things, maybe I would have been. But they didn't (haven't) and we did. Oh, well. Be warned, there's more mild cussing in this post than usual.


Three weeks ago.
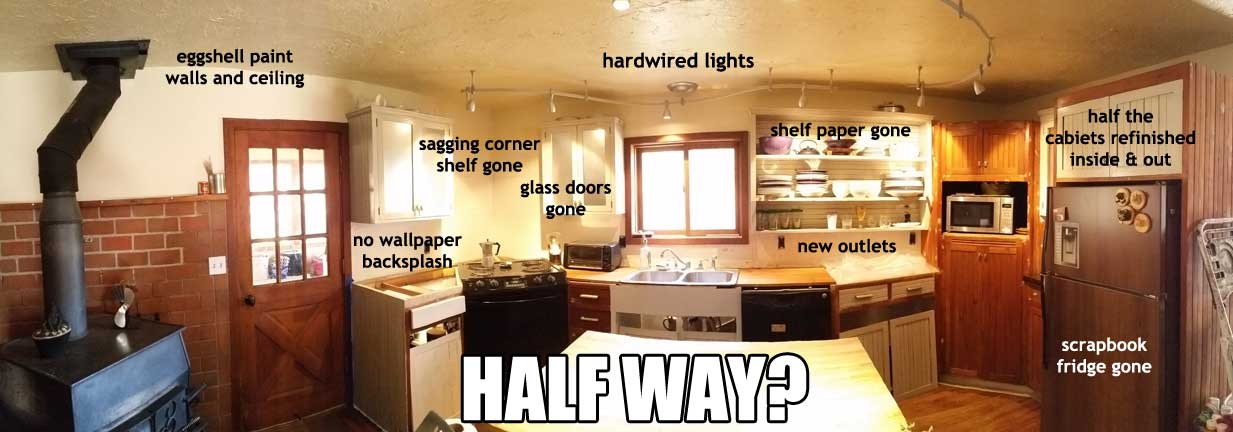
Four weeks ago and now that the original list is longer, probably not halfway. Oof.


1. Refinishing the cabinets.

Hot damn! The last four drawers are dee ewe en done, boy howdy!

And you bet I refilled those drawers right after taking this shot.

EXTENUATING CIRCUMSTANCES

We are still waiting on the damn hinge screws to get the last 6 doors hung back up.


ETC.

I think I may have figured out how to make the door to cover the too-big-microwave space in the cabinets using the tools I already have. But I am going to allow myself to have a Phase II and have this project be a part of it. I'm just about ready for a break from this project.


The last bit of the cabinet part of the project is finishing the priming and painting the inside of the corner pantry piece. Perhaps next week. Oh, and reinstalling the last 6 doors should the hinge screws ever arrive.

2. Repair walls & ceiling, paint.


Never mind the ceiling texture. We're just sort of stuck with it until I feel compelled to spend weeks craning my neck and skimming it out. That could be a very, very long time.

The anchor holes in the ceiling from the non-hardwired light fixtures have been there since early on in this project. I finally got up the gumption to deal with them. It was not a difficult project, just a pain in the rear end. Many steps that take more time to prep for and clean up after than to do... a real drag. In order to make it feel more worthwhile, I went ahead and got rid of the the last two anchors - on the last hallway wall to be worked on - and repaired those as well. Then I skimmed out the dumb texture, primed and painted. This part is a real yawner, but that doesn't mean I didn't take yawner photos.

Look ma! No holes!


What's not a yawner is that #4 on the original list is done! Well, less of a yawner. To me.

EXTENUATING CIRCUMSTANCES

I know it's hard to see in that photo, but this rough "barn wood" wainscot in this short hallway might have to come down in the future. Or maybe just the cap? Make it smaller? I can't decide if I hate it or am ambivalent.

3. New refrigerator surface.

Over an hour of scrubbing with Bar Keeper's Friend to get the remaining adhesive leftover from when I dismantled the scrapbook fridge (see the before-est photo here).


Some other refrigerator-related actions have occurred, but I think I'm going to wait to reveal details of that part of the project when it's totally done! Oh, the suspense!

EXTENUATING CIRCUMSTANCES

While I had the fridge rolled out of it's cabinet I decided to try to figure out how I could level it up. That's when I realized that the fridge is just barely out of level. The freezer door is more out of level and what I read to do about leveling it up did not take. Meh.

3. Magic cap catcher update!

Catchin' caps and taking names.

If you don't know what the heck this is all about, it's about this.

4. Rant

I am real damn tired of my house (and outbuildings) giving me splinters. Rustic does not mean rough! We have some "barn wood" type situations here at the house from way before barn wood was a thing, but these so-and-so's just tore it off the barn and put it in the house. It's practically fuzzy with splinters. Now, I have a pretty hefty spring/summer project list, but I might have to squeeze in sanding and finishing some posts and a beam downstairs... out of spite if nothing else.

B. Unrelated to the kitchen project.


Betty, Betty holding steady.


The original list of the order I thought the projects will happen. Line through for complete items, italics for additions. I'll let myself do partial line throughs for partial completion, because it's good for my morale.

1. Light fixtures
2. Remove corner shelf in order to...
3. Remove wallpaper and repair walls (& ceiling) as necessary, get temp solution for backsplash
4. Paint walls above cabinets, around wood stove, paint laundry/bath hallway.
5. Cabinet repair, move, modify
6. Refinish cabinets
8. Level, repair, and refinish counter tops
11. New sink and faucet and the counter modifications that go with it.
10. Replace outlets, switches, plates in backsplash.
9. Install backsplash, probably tile
12. New refrigerator surface to replace old new refrigerator surface.
16. Replace light switch and plate in hallway.
14. Replace outlets, switches, plates by wood stove.
15. Paint wood stove and stovepipe. 
7. Maybe try to do something with that terrible brick veneer wood stove surround?
13. Build a door of some sort for that too-big hole for the microwave & deal with the inside.


Tuesday, May 3, 2016

One Step at a Time: Kitchen Edition, It Does Go On, Doesn't It?

The last little fiddly bits seem like they take ages, especially when they are parts of different projects within the project. And then the fact that we keep adding "little" projects makes it seem like we've ages to go.

Two weeks ago.

Four weeks ago and now that the original list is longer, probably not halfway. Oof.


1. Installing the backsplash.


I picked up brown caulk and installed it on Wednesday. This completes number 9 on the original list (below). HOT DAMN!


2. Refinishing the cabinets.

The last pieces of the carcass were varnished early in the week! To celebrate, I put up some decor using the picture rail hooks and cord. It was unduly exciting to get Dale the Jackalope back in his rightful place and joined by my cool new birthday resin antlers!


I admit, it's a little bit of a thrill to put to use my idea of using picture rail to add a crown to the upper cabinets. And a little bit of a thrill to get out and use the particular picture rail hooks I found which are just right.


The last four doors, all for the corner pantry, are done and ready to go up when the dagburn hinge screws get here. I do not believe it is the fault of my local lumber yard that this has taken so long, but I do wonder how the ever-loving hell a hardware distributor can not just freaking distribute hardware. Hardware that has specifically been requested. The rep doesn't even have to come out to get the commission - it's been called in. Why do they not want easy money?

No, this does not mean that my hinge screws came it. It means that the little doors above the fridge and microwave are being held temporarily in place by the magnetic closures.
You can see I've removed the faux bois "skin" and the handles on the fridge in preparation for #12 on the original list (below).

The last four drawers are well on their way and the interior of the corner pantry is next up. I am not looking forward to emptying it and stashing dry good in boxes that we'll have to keep dogs from sniffing around. But I am looking forward to being able to see better inside the pantry and all the other cabinets are now better organized just from having taken things out and put them back in, so hopefully that'll happen with this one, too.

3. Doing something to that terrible brick veneer wood stove surround.


First, the wood rail at the top came off. We'll replace it with something a little more finished-looking and level. Not only were the lag screws drilled at varying distances from the center of the shelf, they were lag screws used for finish carpentry AND it seems whoever installed them was making up for the way-too-short screws that "held up" a couple of the upper cabinets. These suckers practically went into the laundry room on the other side of that wall!

Note that whoever installed this little shelf/cap didn't even make a fresh cut to get rid of the mill stamp on the end of the lumber, let alone sand it at all.

Second, reattaching the loose "bricks" and re "mortaring" the loose or missing "mortar." The last owners seemed to think that the "mortar" around the "bricks" is what attached them to the wall so to "fix" loose "bricks" they just added more caulk tube mortar. So yeah. At some point in the next few years we're hoping to replace our wood stove with something slightly smaller, with a window in the door and a built-in fan. At that point, we'll redesign the whole hearth area and hopefully use something less textured - i.e. less dust collecting - probably some kind of slab material


Third, make a sample to determine how exactly I'm going to make these red bricks look like some not-red bricks that I found online and pinned on my "Homefront: Kitchen Revamp" pinboard. But that'll be next week.

EXTENUATING CIRCUMSTANCES

When searching for something else related to wood stoves online, I happened upon stove paint - not the appliance paint you get at the home center or hardware store - and now we're thinking we want to paint the wood stove. After reading the instructions for the paint, I am thinking that I need to do that before I refinish the bricks. Sigh.

B. Unrelated to the kitchen project.


The mass in Betty's chest had not diminished after 3 weeks of chemotherapy. This was a likely outcome, because the tumor is benign and therefore slow-growing. So we are discontinuing chemotherapy. Because the fluid has stayed off, we are continuing with the prednisone and in two weeks she'll get another sonogram to see if the fluid is kept off by the prednisone.

She seems to be feeling pretty well. Other than some side effects of the prednisone and the occasional slightly-to-moderately labored breathing, she is acting pretty normally - just a smidgen more leisurely.


The original list of the order I thought the projects will happen. Line through for complete items, italics for additions. I'll let myself do partial line throughs for partial completion, because it's good for my morale.

1. Light fixtures
2. Remove corner shelf in order to...
3. Remove wallpaper and repair walls (& ceiling) as necessary, get temp solution for backsplash
4. Paint walls above cabinets, around wood stove, paint laundry/bath hallway.
5. Cabinet repair, move, modify
6. Refinish cabinets
8. Level, repair, and refinish counter tops
11. New sink and faucet and the counter modifications that go with it.
10. Replace outlets, switches, plates in backsplash.
9. Install backsplash, probably tile
7. Maybe try to do something with that terrible brick veneer wood stove surround?
12. New refrigerator surface to replace old new refrigerator surface.
13. Build a door of some sort for that too-big hole for the microwave & deal with the inside.
14. Replace outlets, switches, plates by wood stove.
15. Paint wood stove and stovepipe.