Showing posts with label making. Show all posts

Wednesday, June 12, 2019

Overbooked? Making our Library Space 1E


[Deep breath in]

My plan was that once the walls and ceiling were finally fixed and fancified and the outlets and switches replaced and plated, I would finally tackle the closet. But instead, I was waiting for what was supposed to be a 2-day delivery of more Venetian plaster, but was in fact a nearly 2-week delivery*. Also there was a snafu with the dimmer switch - oy. I had to switch gears entirely on that which bums me out, but that's the way these things go, I guess. You see, I had found and ordered these great switches and outlets which you will see in the next post. They blended right in with the indigo blue wall finish! The problem is that the dimmer switch was a "smart switch" which means it requires a neutral wire to function at all. Of course our 1976-built house isn't wired with those and the only solutions were either to have an electrician add one between the light and the switch or to find a "dumb" dimmer. I was not excited about spending what would probably be a couple hundred dollars just for this one wire. Eric is vehemently opposed to adding smart technology to the house, because personal security/privacy technology has not kept up with the smart technology.  Neither of us are having anything to do with any smart speakers, etc. so this made sense to me. I made sure that this product line did not include a non-smart dimmer (it did not), searched for another company that might have a similarly colored, non-smart dimmer (I found none), then decided to go a completely different way with the main light dimmer switch (but not the closet light switch or the outlets). My beautiful blue switch and its plate were returned and the Plan B switch and plate ordered (on sale!).

[Deep breath out]

So  decide to start on the closet while waiting on that. Even with all the disappointment and frustration of the dimmer switch debacle fresh and tender, it's still ridiculously satisfying to have this closet spruced up and made more suitable to our needs.

[Satisfied sigh]

Here is how the closet was when we moved in. Well, it came to us with doors, base moulding, and that carpet, but I removed all of those at the beginning of this project. They'll all get reinstalled after the floor goes in... except the carpet, of course.

[Shudders]
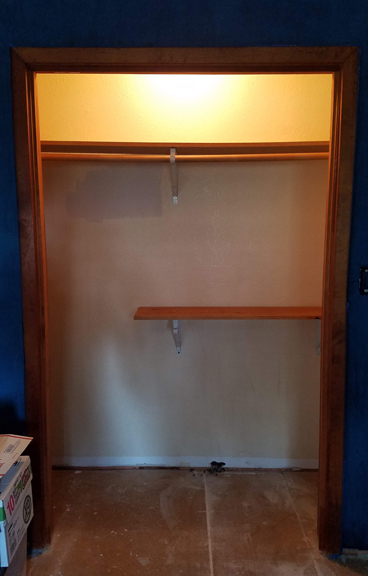
I consider us lucky that there are lights in the 2nd and 3rd bedroom closets. At least with this one, the switch is at or pretty close to standard height.

First, I took out the shelves and rods along with the hardware. Second, I repaired and painted the walls. Heck, I painted the ceiling, too.

Let's pretend there is a comma after "no" up there.

If you're wondering why the space outside the closet seems dark, it's because I did this work and took this photo before reinstalling the old main light switch, so the room itself was a little dim.

Third, I got new materials: brackets and shelving which I had cut to size at the store for the shelves on the right. The top shelf I custom cut myself. Then to the exposed cut areas I added the iron-on tape sold for this purpose. I determined that I could stall the top shelf a little higher if it was not the full 24" depth where it passed behind the door, because it would leave more space for fitting larger boxes and such. I didn't want to lose any storage space I didn't have to, so I decided to try this instead of just putting in a 12" shelf all the way across or trying to wrangle three different shelves at the same level.


After the floor is installed and the base moulding back up, I'll put in that last shelf.
MAXIMIZIN' THAT CUBIC AREA STORAGE LIKE A BOSS!

It would have been nice to be able to reuse the shelves that were in the closet as a start, but this is not for storing our clothing, it is for storing craft, art, and sewing supplies so I want to utilize every cubic inch that I can which means shelves the full depth of the closet. I did get to reuse the brackets that hold the closet rod and the rod itself.

A place to hang the big stencils, sewing projects, life-sized skeletons, etc. and to keep the wide rolls of upholstery and vinyl.
Of course what would have only taken a couple hours to accomplish actually took several days due to none of the 4 hardware/building materials retailers within 10 miles of here had particle board screws or anything with the appropriate threads in a short-enough length. Because apparently none of the professionally installed particle board shelving going into ALL the closets around here is installed using best practices. Annnnnd I imagine that's the case everywhere and it's just me being persnickety. I'm OK with that.


One last shelf will go in on the bottom right after the floor is done.

[Whoop]

Getting this part of the project checked off the list really helped the upstairs feel a bit more livable since many of the crafting materials that had been moved out of this room were stored on shelves that had been moved into the hallway. Ugh. We still have all the furniture and some of the stuff that will be stored in the closet stashed in places around the second floor, but this helps a little.

[Satisfied sigh]

*Emails have been sent, 1-star rating left**, product returned, refund issued.
** With specific, rational & non-ranty reasons described in review. Which is when the seller actually decided to respond. Too little, too [expletive] late, M_xW_rehouse.

______________________________________________________________

THE BREAKDOWN

Phase I
1. Empty that room!
2. Remove base moulding
3. Remove closet doors & hardware
4. Remove the carpet and pad
5. Remove tack strips and staples
6. Remove chair rail and paneling
7. Determine if wall paper is removable
8. repair walls
9. prime walls and ceiling
10. paint walls and ceiling
11. decorative finish(es)?
12. replace light fixture (back-ordered, supposed to be available July 7)
13. replace switches and outlets, covers (dimmer switch ordered, but not arrived)
14, make and install closet shelves, etc.
15. prime existing subfloor x 2
16. pour self-leveling subfloor
17. install LVP
18. reinstall base moulding
19. reinstall closet doors
20. install transition piece at doorway
21. make window covering
22. install window covering

Phase II
1 - ?. Build built-in bookshelves
... Finish last course of flooring
... Add base shoe or other moulding to bookcases
... picture rail


Thursday, December 20, 2018

Another Festive Holiday Potty!


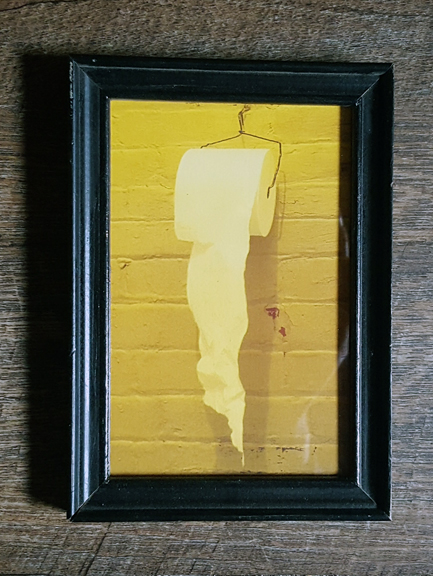
I just couldn't seem to keep myself from taking the dad jokes and potty humor decor of the "new" water closet all the way to Christmas. Luckily, I'm not the only one with a 9 year-old sense of humor*!


The ornaments and figurine/toy were found at chain stores. But this one I made with my Cricut machine out of materials on hand.


In case you don't remember all the gags and jokes from National Lampoon's Christmas Vacation or you do and want to watch again: https://youtu.be/4fyS5CLBgyM

* But an adult vocabulary.


Friday, November 2, 2018

Let's Potty! Part III - A Water Closet Renovation


Sometime this spring I took on the project of replacing all the flooring on our second story. Of course, that project lead to other while-I'm-at-it projects, including almost totally remodeling/redecorating the little water closet in the master "suite." It should've taken a couple weeks of fairly consistent work, but instead it took months of totally inconsistent work. Phases A-E and F-H, if you have forgotten or are otherwise interested. As usual, I was very thrifty about this whole thing. Buying this many pieces pre-made and full price would've cost more than the rest of it put together, so of course, I made most of these.


I have one more piece already purchased to go in that spot lower right corner; I just need to find a frame for it.


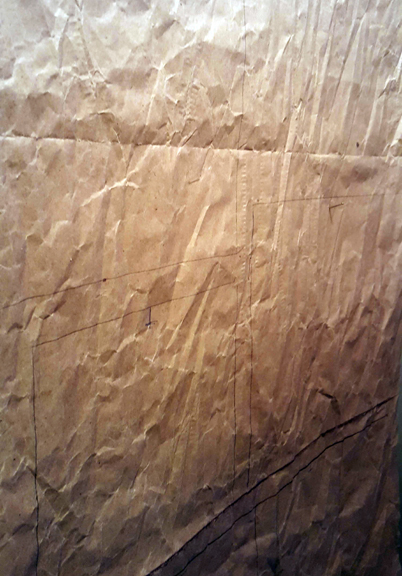
Phase I (that's an uppercase letter "i," not a Roman numeral one): Fun and funky decor items. For some reason the idea of a gallery wall style display of silly, potty-themed things got stuck in my head and it didn't let go. I had a lot of fun, giggly moments coming up with what I have so far, but they'll be hard to photograph in that tiny room, so I took pictures before installing them. I've seen a few methods for planning and hanging gallery walls on pinterest and decided to make templates to use for putting in the nails. I had this wrinkly packing paper on hand so cut it to size and went for it.


I drew two baselines, 3/4" apart, separating the bottom third of the papers. That is to line up with the 3/4" base of the TP cabinet to create a visual line that flows around 3 sides of the water closet. Then I arranged all the pieces I have so far. I'm a big fan of "a structured border containing chaos" and that is what this gave me. It's also why I love the English Garden style.


I used a pencil to draw around the pieces as they were laid out, so the marks are hard to see. I didn't trust myself not to get ink on my things! Then I used a grey marker to mark where the hanger would fit a nail. Once the paper was on the wall and all leveled up, I tapped a nail though the marks just enough to mark the wall underneath. Finally, I took down the paper and hammered in the nails.

I spent a lot of time on the pieces that I made so, here they are all individually photographed for your viewing pleasure. By which I mean, my need to hassle you with the details.

I made my first-ever cross stitch projects! I bought three patterns each from two different Etsy sellers and went to town on airplanes and evenings over the summer. I had 2 frames in the stash and bought the rest at thrift stores, a garage sale, and at deep discount.

These are the first three I made. I bought the patterns from this Etsy store.


Then I went ahead and ordered three more patterns from this Etsy shop.


I have also finally started exploring what my Cricut can do with a little help from a friend who came to visit so I could finally put together these paper projects!The first is based on a sign a friend has in her cabin's bathroom. The second is based a couple of scenes from the movie "Elf" _ I altered that frame, too! The third is a free printable I found online and the fourth is based on something I found on pinterest - it's all mounted on a stretched canvas that I had in my stash.


It's been awhile since I've gotten to make a diorama, but I received a gracious gift of a bunch of vintage Fisher Price Little People stuff just in time to make a potty diorama! < LOTS of detail photos at that link.


I didn't want all the stuff to be made by me, because I didn't think that would look quite like a true gallery wall display: collected over time from various sources. So I searched and am continuing to search for silly, potty-themed bits to include.

I have had this blank note greeting card for ages. Not sure why I bought it, but pretty sure I know why I haven't ever given it.

I picked up this weirdo at this Etsy shop after seeing them on Instagram.


I found this nesting set of two shadow box shelves at a junk store in a neighboring town for just $5! Even though the finish was a bit chipped, they were otherwise in great shape and well-made. So I sanded them down and refinished each of them a bit differently.


It really seems like I have had a long run of projects going pear-shaped on me these last months and man, does if feel good to finally have this water closet redo behind me. Well, mostly behind me. I expect to pick up more pieces for the potty-humor gallery as I find them.


Wednesday, October 31, 2018

Let's Potty! Part II - A Water Closet Renovation


As home remodeling projects tend to go, this one ran into some obstacles which made it take a bit longer. The biggest obstacle was simply that we ended up having to order our new toilet, because they were out of stock. Luckily, they had some coming and we got our name on one! Yeah... we're considering ourselves lucky to have our name on a toilet. Phases A-E are here. Below are the long-winded phases!

Phase F: Install new, modern, low-flow toilet

I forget about good ol' WD-40, so was mentally preparing myself to have to take a hacksaw to the various metal bolts holding all the parts of the old toilet together. Pulling the old beast (tank dated: August 14, 1977, so still younger'n both of us) out of that tiny room was still a hassle, but less of a hassle than feared.


You know you're a reeeeeally grown up grown-up of a certain stripe when things like fancy toilets and endless storage space with thoughtful design are part of your lottery-winner fantasies. This toilet is not fancy, but was rated highly-enough and the price was right. In fact, simply by pulling the old toilet out myself, I probably saved the cost of the new toilet! And by installing that myself, I saved the cost of disposing of the old one and buying a new flange... plus some. So this is essentially a free new toilet! Or something.

We picked up a new trash can - one with a lid, because a certain member of our family likes to eat things out of the trash can. I'll let you determine which one of us that is. Ahem. Not sure we'll be keeping the rug-thingie. This is the only toilet in my life that has ever had one and I'm not convinced I want one. It's hardly been used and it seems like a thing no one is going to want to buy used, so the idea of generating waste by not keeping it is bothersome. Yeah, I'm that person.

Bummer: I ordered the toilet on August 8 with a pick-up date of August 24. When I didn't hear from them on the 24th, I called on the 25th. They had no real idea when to expect it, but since it was a stock item they guessed August 31st of September 3rd. I got the call on               . I called again on September 5, and was told it was there! This situation was more frustrating than I expected it would be,  because having any clean running water with indoor toilets is pretty great and we have two even without this one.

Phase G: (Reprise): Install that TP holder... with a modification.

I had to move the holder to the far right of the crate to make room to replace the roll, because the whole kit and kaboodle needed to be installed closer to the door than I expected.


Phase H: Refinish and hang cabinet for TP or make/buy holder-storage combo.


So, I decided that I needed to go with the make/buy option... which became the make option.

The toilet is not centered, so I had to decide how to hang the cabinet: centered over the toilet or centered on the wall. The difference between the center marks was about an inch and I roughly split the difference.


I've already been down the special-toilet-paper-for-a-particular-bathroom-due-to-storage road and I am over that crap. (heh)


It is a bummer not getting to reuse that perfectly serviceable cabinet and that the TP holder wasn't going to do. I donated both pieces to the local used building materials warehouse. I did look there for replacements for both of these pieces, but had no luck. All this means that I ended up making a little cabinet! I had purchased a pair of these little bi-fold doors at a thrift store years ago and am glad to finally actually use at least half of them. The wood* for the carcass came from shelves we removed from the master bedroom shortly after moving in. I was also able to use stash for the shelves, shelf pegs, and paint. And the knob is an antique door knob we brought with us that had been in Eric's basement in the old 1911 Craftsman in Portland! I did buy the plywood for the backing, new hinges, and some supplies to make the doorknob into a cabinet knob.


Another bummer: So. The carcass. Well, I hadn't remembered we had those 1x8s stored in the rafters of the shop and when I was shopping I decided to save on budget and buy some MDF. Well. Sigh. Let's just say that didn't work out for me. The bummer is exacerbated by the fact that scraps of MDF 1x6 and 1x8 aren't nearly so useful as "real" lumber. The bummers just keep coming: the door was too heavy for the hinges I bought, which were pretty much the same as the hinges that had been on it if the "scars" were any indication. So I ended up buying continuous (i.e. piano) hinges. And then procrastinated installing them, because I was scared that they also would work, but they did!


Part III:
Handmade & vintage decorations!


Thursday, January 11, 2018

Making the Most of Icy Weather

NOTICE: I don't know why the body text is highlighted. Well, I have an idea why, but my attempt to fix it failed and I don't want to put any more work into it, so I guess we can all just be glad that this post is mostly photos of a dog in her funny outfit and focus on that.

When life hands you lemons in the form of an ice rink driveway, you make lemonade in the form of a figure skater outfit for your dog! And my "you" and I mean "me/I."


I dug through all my fabrics & trims bins looking for remnants and leftovers to cobble this majestic outfit together and came up with a variety of golden treasures!


Ruffles!

Sequins!

Please note the flutter sleeves.

The whole thing is lined with polar fleece remnants.


Saturday, October 21, 2017

The Trials of Solomon Parker - Getting Crafty

I'm having a hard time finding the enthusiasm to put together that promised post on our experience with the Lolo Peak Fire, but I will get to it. In all likelihood.

IN THE MEANTIME, here's what's been going on around here in regards to Eric's second novel's release earlier this month*: fan crafting!**


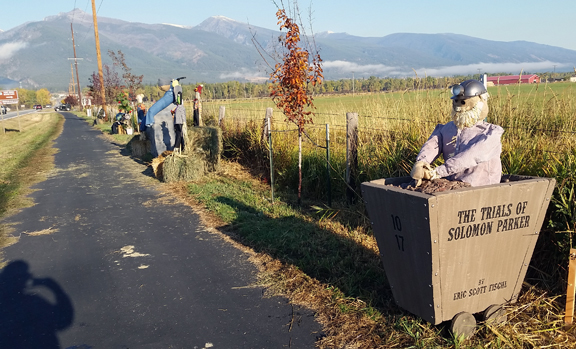
The Trials of Solomon Parker has a cyclical plot, rotating between Butte, Montana during the copper wars years, and Stevensville, Montana around 1900. So this year, I got the bug to participate in Stevensville's annual Scarecrow Festival (Oct 6-7) with a TToSP-themed scarecrow!


On Saturday, Oct 7, Eric set up at the Blacksmith Brewing Co. tasting room to talk with folks and hopefully sell some books, which he did.


This was the perfect opportunity to play the awesome book trailer his friend, Patrick of Afflux Films, made:


And of course, this kind of event inspired me to make another book display piece, this time a miniature mine car.


One thing I noticed about the set up at the Blacksmith Brewery tasting room is that it was kind of hard to tell exactly what was going on with that-guy-sitting-there-with-some-books-in-front-of-him. This is especially the case once friends started showing up and visiting. I decided a little backdrop would help make it obvious that Eric was there with a purpose other than drinking and that this could be useful for other only-semi-official-events.


I looked at a few tutorials online for the frame, made size adjustments, then assembled a portable stand out of 3/4" PVC. There are about a bazillion blogs posting the same process, even calling it the same thing, so I won't go into it here. You can search "10 minute, $10 photo backdrop" to find it, but let me tell you two things: you won't get all the materials for $10 unless you find some kind of smoking deal and it will take more than 10 minutes just to clean the writing off the pipe (if you are so inclined) and of course more than 10 minutes to go buy it all. ;) Nonetheless, it is a quick and inexpensive way to make a backdrop stand that could have plenty of uses for plenty of folks. I expect we'll use it for Eric's future books' events as well as for Halloween decorating, etc.


For The Trials of Solomon Parker backdrop, I used the same techniques I used to make the Dr Potter's Medicine Show banner:

  • Pre-washed & cut fabric to fit, hemmed sides, sewed rod pockets at top and bottom
  • Printed out an image to fit my opaque projector, 
  • Traced that onto cloth using opaque projector, 
  • Hand-painted where I'd drawn the projected image with acrylic paint mixed with fabric medium


HELP!
You know what really, truly, helps authors and is super easy? Rating their books on Amazon and/or GoodReads. If you think The Trials of Solomon Parker is worth 4 or 5 stars, please follow one or both of those links and click the stars! It truly only takes a few minutes, less if you already have a GoodReads account. No matter where you bought your copy, you can leave stars on Amazon.


* October 3 in US and Canada. 5 October in UK, Ireland, Australia, New Zealand, South Africa, India.
** No kidding.