Thursday, December 20, 2018

Another Festive Holiday Potty!


I just couldn't seem to keep myself from taking the dad jokes and potty humor decor of the "new" water closet all the way to Christmas. Luckily, I'm not the only one with a 9 year-old sense of humor*!


The ornaments and figurine/toy were found at chain stores. But this one I made with my Cricut machine out of materials on hand.


In case you don't remember all the gags and jokes from National Lampoon's Christmas Vacation or you do and want to watch again: https://youtu.be/4fyS5CLBgyM

* But an adult vocabulary.


Friday, November 2, 2018

Let's Potty! Part III - A Water Closet Renovation


Sometime this spring I took on the project of replacing all the flooring on our second story. Of course, that project lead to other while-I'm-at-it projects, including almost totally remodeling/redecorating the little water closet in the master "suite." It should've taken a couple weeks of fairly consistent work, but instead it took months of totally inconsistent work. Phases A-E and F-H, if you have forgotten or are otherwise interested. As usual, I was very thrifty about this whole thing. Buying this many pieces pre-made and full price would've cost more than the rest of it put together, so of course, I made most of these.


I have one more piece already purchased to go in that spot lower right corner; I just need to find a frame for it.


Phase I (that's an uppercase letter "i," not a Roman numeral one): Fun and funky decor items. For some reason the idea of a gallery wall style display of silly, potty-themed things got stuck in my head and it didn't let go. I had a lot of fun, giggly moments coming up with what I have so far, but they'll be hard to photograph in that tiny room, so I took pictures before installing them. I've seen a few methods for planning and hanging gallery walls on pinterest and decided to make templates to use for putting in the nails. I had this wrinkly packing paper on hand so cut it to size and went for it.


I drew two baselines, 3/4" apart, separating the bottom third of the papers. That is to line up with the 3/4" base of the TP cabinet to create a visual line that flows around 3 sides of the water closet. Then I arranged all the pieces I have so far. I'm a big fan of "a structured border containing chaos" and that is what this gave me. It's also why I love the English Garden style.


I used a pencil to draw around the pieces as they were laid out, so the marks are hard to see. I didn't trust myself not to get ink on my things! Then I used a grey marker to mark where the hanger would fit a nail. Once the paper was on the wall and all leveled up, I tapped a nail though the marks just enough to mark the wall underneath. Finally, I took down the paper and hammered in the nails.

I spent a lot of time on the pieces that I made so, here they are all individually photographed for your viewing pleasure. By which I mean, my need to hassle you with the details.

I made my first-ever cross stitch projects! I bought three patterns each from two different Etsy sellers and went to town on airplanes and evenings over the summer. I had 2 frames in the stash and bought the rest at thrift stores, a garage sale, and at deep discount.

These are the first three I made. I bought the patterns from this Etsy store.


Then I went ahead and ordered three more patterns from this Etsy shop.


I have also finally started exploring what my Cricut can do with a little help from a friend who came to visit so I could finally put together these paper projects!The first is based on a sign a friend has in her cabin's bathroom. The second is based a couple of scenes from the movie "Elf" _ I altered that frame, too! The third is a free printable I found online and the fourth is based on something I found on pinterest - it's all mounted on a stretched canvas that I had in my stash.


It's been awhile since I've gotten to make a diorama, but I received a gracious gift of a bunch of vintage Fisher Price Little People stuff just in time to make a potty diorama! < LOTS of detail photos at that link.


I didn't want all the stuff to be made by me, because I didn't think that would look quite like a true gallery wall display: collected over time from various sources. So I searched and am continuing to search for silly, potty-themed bits to include.

I have had this blank note greeting card for ages. Not sure why I bought it, but pretty sure I know why I haven't ever given it.

I picked up this weirdo at this Etsy shop after seeing them on Instagram.


I found this nesting set of two shadow box shelves at a junk store in a neighboring town for just $5! Even though the finish was a bit chipped, they were otherwise in great shape and well-made. So I sanded them down and refinished each of them a bit differently.


It really seems like I have had a long run of projects going pear-shaped on me these last months and man, does if feel good to finally have this water closet redo behind me. Well, mostly behind me. I expect to pick up more pieces for the potty-humor gallery as I find them.


Wednesday, October 31, 2018

Let's Potty! Part II - A Water Closet Renovation


As home remodeling projects tend to go, this one ran into some obstacles which made it take a bit longer. The biggest obstacle was simply that we ended up having to order our new toilet, because they were out of stock. Luckily, they had some coming and we got our name on one! Yeah... we're considering ourselves lucky to have our name on a toilet. Phases A-E are here. Below are the long-winded phases!

Phase F: Install new, modern, low-flow toilet

I forget about good ol' WD-40, so was mentally preparing myself to have to take a hacksaw to the various metal bolts holding all the parts of the old toilet together. Pulling the old beast (tank dated: August 14, 1977, so still younger'n both of us) out of that tiny room was still a hassle, but less of a hassle than feared.


You know you're a reeeeeally grown up grown-up of a certain stripe when things like fancy toilets and endless storage space with thoughtful design are part of your lottery-winner fantasies. This toilet is not fancy, but was rated highly-enough and the price was right. In fact, simply by pulling the old toilet out myself, I probably saved the cost of the new toilet! And by installing that myself, I saved the cost of disposing of the old one and buying a new flange... plus some. So this is essentially a free new toilet! Or something.

We picked up a new trash can - one with a lid, because a certain member of our family likes to eat things out of the trash can. I'll let you determine which one of us that is. Ahem. Not sure we'll be keeping the rug-thingie. This is the only toilet in my life that has ever had one and I'm not convinced I want one. It's hardly been used and it seems like a thing no one is going to want to buy used, so the idea of generating waste by not keeping it is bothersome. Yeah, I'm that person.

Bummer: I ordered the toilet on August 8 with a pick-up date of August 24. When I didn't hear from them on the 24th, I called on the 25th. They had no real idea when to expect it, but since it was a stock item they guessed August 31st of September 3rd. I got the call on               . I called again on September 5, and was told it was there! This situation was more frustrating than I expected it would be,  because having any clean running water with indoor toilets is pretty great and we have two even without this one.

Phase G: (Reprise): Install that TP holder... with a modification.

I had to move the holder to the far right of the crate to make room to replace the roll, because the whole kit and kaboodle needed to be installed closer to the door than I expected.


Phase H: Refinish and hang cabinet for TP or make/buy holder-storage combo.


So, I decided that I needed to go with the make/buy option... which became the make option.

The toilet is not centered, so I had to decide how to hang the cabinet: centered over the toilet or centered on the wall. The difference between the center marks was about an inch and I roughly split the difference.


I've already been down the special-toilet-paper-for-a-particular-bathroom-due-to-storage road and I am over that crap. (heh)


It is a bummer not getting to reuse that perfectly serviceable cabinet and that the TP holder wasn't going to do. I donated both pieces to the local used building materials warehouse. I did look there for replacements for both of these pieces, but had no luck. All this means that I ended up making a little cabinet! I had purchased a pair of these little bi-fold doors at a thrift store years ago and am glad to finally actually use at least half of them. The wood* for the carcass came from shelves we removed from the master bedroom shortly after moving in. I was also able to use stash for the shelves, shelf pegs, and paint. And the knob is an antique door knob we brought with us that had been in Eric's basement in the old 1911 Craftsman in Portland! I did buy the plywood for the backing, new hinges, and some supplies to make the doorknob into a cabinet knob.


Another bummer: So. The carcass. Well, I hadn't remembered we had those 1x8s stored in the rafters of the shop and when I was shopping I decided to save on budget and buy some MDF. Well. Sigh. Let's just say that didn't work out for me. The bummer is exacerbated by the fact that scraps of MDF 1x6 and 1x8 aren't nearly so useful as "real" lumber. The bummers just keep coming: the door was too heavy for the hinges I bought, which were pretty much the same as the hinges that had been on it if the "scars" were any indication. So I ended up buying continuous (i.e. piano) hinges. And then procrastinated installing them, because I was scared that they also would work, but they did!


Part III:
Handmade & vintage decorations!


Monday, October 29, 2018

Whose Poop Is This, Anyway?


Sometime in the last couple of weeks I realized just how long it had been since we'd had a mystery scat sighting. And then on Friday, Oct 26, Eric spotted these a few feet from our fence, in the brush beside the road.


He was out walking with Delia and sent me a text message, so of course I went right down to investigate. I clambered over the fence to get a closer look. They were much larger than I thought they were based on his photo. Because I thought that they were much smaller, the mostly-white color made me think they might be from the turkeys which have been hanging around up here a bit more lately.


These are definitely not from turkeys. After getting these photos, I found a twig to do some quick dissection. By which I mean "poking and tearing at."


As we both expected, the grey bits are grey fur. Whose fur, we don't know. The poking also informed us that they were more solid than they appeared to us just by looking. A very quick internet search has not given us even a real hint as to why the rest is white, though.


This little bit of business at the end hints at coyote. So, we'll keep our eyes out for falling anvils and cave entrances that are really just painted onto the cliff face, just in case.

Later that afternoon, Delia and I were on a walk about and she led us back to the scene.


What did I spot, but a trio of turds! Well, a trio of turd groupings and they all lined up in a neat little row! The one on the yard-side of the fence has to be Delia's. But that middle one? It looks too fresh to have been any of the dogs that were allowed to run loose, because their families have moved away.

THE NEXT AFTERNOON (Saturday, October 27) Delia and I were checking the perimeter again and THE WHITE POOP WAS TOTALLY AND UTTERLY GONE!


Given the strange coloration of the first pile we spotted, the geometrically precise alignment, and the disappearance without a trace... well, I'm not saying it was aliens, but... *

What do you all think?


* It was aliens.


Friday, October 26, 2018

Adventures in DIY Flooring - Cutting the Rug VII


When I started the bloggy part of replace-all-the-upstairs-flooring project I wasn't sure about continuing the "Cutting the Rug" titling for the hall bathroom, since it wasn't carpeted. Then as I was tearing out the laminate I found that indeed at some point, glue-down carpet had been installed. ICK! And EWWWW!

See that  bit of carpet still stuck on the vanity? Also, there is dried adhesive on the original vinyl.


I also found what appears to be the original, sheet vinyl flooring. I don't know why I assumed they'd torn out whatever was in there before putting down the laminate, but I did. And it turns out that with the exception of the carpet phase, all the floors in her have been wood-look, so that's interesting-ish, at least.

There's that 1970s version of the faux wood (with dried carpet adhesive on it) at the bottom and the 2010-ish laminate version of faux wood at the top. That little white bit in the bottom right corner? That appears to be a water damage repair in front of the shower*.

Unfortunately, the newest phase of this bathrooms floor requires that the sheet vinyl be removed. Why? Well, because the VPL needs the floor level within perimeters that is is currently not. Just like all the other rooms. That means pouring more self-leveling subfloor and that means I had to remove the vinyl... yeah, I even called the manufacturer to make sure. UGH.

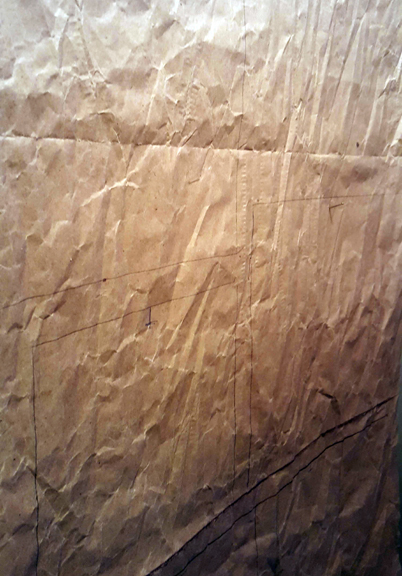
Two layers of vinyl on top of this paper-ish layer shown in light grey, above. This took hours to remove. 

The rest of the process was the same as before: prime, pour, touch up, lay floors. Unfortunately, the base shoe moulding that came out to remove the laminate was not "real" wood. It was particle board covered with material that matched the laminate. Not only was it damaged near the shower*, it wasn't going to take stain to match the wainscot or the new floor. So... that meant new base shoe or base moulding. It's always something.


Still need a transition piece for the door way. Hopefully, I will get most of those installed by Thanksgiving.


The base moulding. Sigh. I found a profile that I thought worked with the wainscot, but it was not quite thick enough to deal with the one sloppily cut piece of flooring. Ahem. I tried three stores. So I settled for a "streamline base" at the third stop. It's not like this is our dream bathroom and it would be worth every minute and penny to find just the right moulding for this project.


I also picked up a more decorative profile for around the base of the vanity. While we're making due with that piece, we still needed something to replace the base shoe that we removed and it's small enough that something a little more detailed wasn't going to be a waste of money.


Here's the thing. OF COURSE I got to thinking, "while the floor and toilet are all out, maybe this is the time to take down the wainscot that we don't love." But we don't hate the wainscot and there is every reason to believe there's at least one layer of wallpaper under there based on what I saw when I took the wallpaper off above the wainscot. And if not that, then there's every reason to believe that the wainscot is glued on. Either way, so much work ahead and all of it would be done and we'd still be stuck with the 1970s sink-counter combo and shower in avocado green. So, as it stands we are still swinging with the 1970s vibe in there, but now with new flooring. I might paint it, though.


I needed something for where the shower is. I didn't want to replace it with base moulding or with base shoe as it had been, so I went with a threshold style piece in oak, stained the same as the balcony door threshold in the guest room.

And a before image from the very beginning when we first moved in 6 years ago and just after we started making it ours (within the limitations of the above mentioned of 1970s fixtures). This laminate was not that old and not so bad, really. We just wanted to have the same flooring all through the upstairs. Heck, I'd go for that downstairs.


Only one room left! It's going to be pretty much an entire overhaul, so it's going to wait until after the new year.


Unforeseen additional steps:

1. There's the base shoe issue mentioned above.

2. Toilet troubles: In order to take out the floor I needed to pull the toilet. In order to pull the toilet, I need to close the toilet water feed valve. OF COURSE. However, it was stuck upon. And stuck but good. Sigh. Luckily, we have a neighbor who is a plumber who came by one morning with his apprentice to replace it. Upside: this presented the opportunity add an escutcheon. Which for some reason is important to me.

3. I did not realize that I'd have to remove the glued-down sheet vinyl in order to apply the self-leveling subfloor. This added a good 2+ days to the project and required us to buy a heat gun and a floor scraper. And put a dent in our adhesive bandage supply, too.

Here is the specialized, custom ventilation solution for dealing with the heat and the smell associated with that heat gun process.


* We don't use this shower - it's not sized for grownups. We've each tried it and did use it when the downstairs shower was out-of-use a few times while working on that room. Based on what I saw when I removed the shower doors downstairs and the types of things hat had gone on upstairs it was the M.O. of previous owners to keep fixing what the leaky-drippy shower doors ruined rather than fix the leaky-drippy shower doors.