"Island time" is especially apropos: We installed a kitchen island, but I took my sweet time posting about it... it was done in September during the building of the woodshed and boy, oh boy, has it made a difference in the functionality of our kitchen. Yowza!
 |
| (photo taken when we viewed the house) |
The former owners had a big round dinette table in the kitchen where I think they ate most of their meals. We never considered putting another dining table in the house and we really wanted (needed?) more storage- and especially more counter space. Originally, I was hoping to find suitable cabinets at one of the used construction materials places that I could refinish, but anything smaller than a full kitchen's worth of cabinets that I found available was real crap. Then, I found this pre-owned butcher block top at the Home ReSource in Missoula! It was the perfect size for an island in our space and a good 3-inches think! I picked it up and it sat in our shop for months while I kept looking for cabinets. Eric was getting very frustrated when cooking on weekend, so we started shopping for new cabinets.
We ended up ordering unfinished, maple, Kraftmaid cabinets through Lowe's when they were having a sale. The lead time was about six weeks, later extended to a little over seven. I finished them myself, then we hired Handyman Nick to install them - I just didn't feel confident to get them level and even and all that. I did cut and install the base shoe, though! I also sanded down all six sides of the butcher block starting with 80gr, moving through 120gr, and finishing with 220gr. Then I finished all surfaces with food grade mineral oil, letting it soak in between a couple coats.
 |
| You can see the very first or very second kitchen project in the background. I am not sure how the look of the fridge might change as we move forward with our redecorating/remodeling of this room. |
While we were at it, we had Nick bring power to the island, too. I picked up one of those nifty outlets with USB ports for charging devices at the home center and chose a color that would blend pretty well with the cabinet stain - there's no reason to ruin the look of the cabinets with a white rectangle, right? You can see where it is on one end of the island in the top photo, but here it is all up close and personal.
The other end of the island is home to a new towel bar. You know you're a grown up when you are so eager for your towel bar to arrive that you compulsively check the FedEx tracking site multiple times a day, day after day. It's solid bronze with an "antique pewter" finish to coordinate with the drawer and door hardware. The towel bar came from Signature Hardware and the pulls and knobs from Hardware Hut. I did try to find this things locally, hitting the home centers and hardware stores, even places like World Market, etc., but had no luck finding what I wanted: simple, but not plain; a rustic-ish type finish.
 |
Speaking of the trash can, this might be Eric's favorite part of the new set up: trash can located right below the cutting station! It's a little bigger than our old can and easier to access because it slides out. The can and hardware are not as deep as the cabinet, which allows room for the electrical outlet and wiring, too. After I removed the shelf paper, scrubbed, I replaced the shelf paper under the sink. Now the cutting boards are off the counter and stored under there. While we generally cut directly on the new butcher block, we do use cutting boards for things that are extra stinky (onions, garlic, etc.), extra stain-y (beets, tomatoes, etc.), and extra bacterial (raw meat).
And now the dirty details:
The drawer pulls pretty much inspired the pewter-like finishes for the hardware. These are low profile so that the drawer hardware over the trash bin wouldn't catch a lot of detritus from falling trimmings and cuttings*.
These knobs are from the same line. They're a cast composite aluminum from Italy, but they weren't expensive and I just love them. We replaced all the door knobs on the existing cabinetry with them, too. And then chose a different drawer pull from the line for the existing drawers which I shared back in September.
Originally, we thought we would put stools on the overhang side, but it doesn't overhang the standard depth, so we'll see. Besides, we ended up setting up a little bar there.
 |
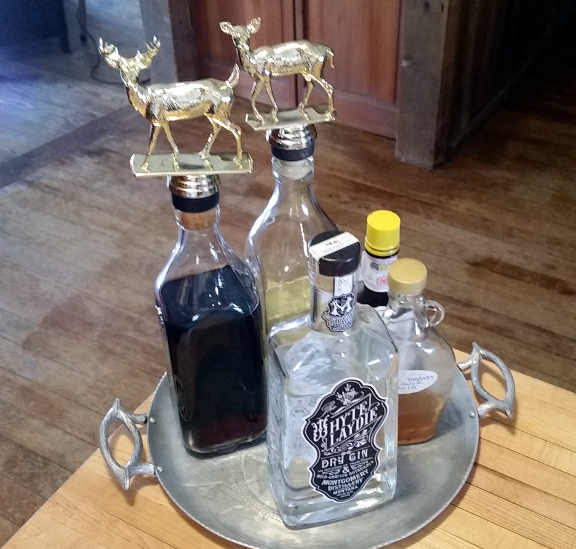
I was given this sweet bar set for my birthday last year, so it's nice to be able to put it where we can see it and use it easily!
And I picked up this vintage, hammered-aluminum tray for our bar basics. The handles are faux bois and there is a pine bough/cone pattern on the tray itself.
I am now all excited to start redecorating/remodeling the rest of the kitchen and have mostly-finalized our choices for finishes, etc. Hopefully, I won't wait months before posting and will share the projects in-progress, as well as finished.
Our starting points from when we first moved in:
* We would like to compost, but we haven't yet found a bear-proof method that would also work during the winter months. If we ever get chickens, I am sure they will help us out with this.


