Wednesday, July 20, 2016

Eulogy For A Good Dog


Everyone thinks they have the best dog. And none of them are wrong. 
~W.R. Purche 


Betty was the first puppy I ever lived with or "had." I was also relatively new to being a dog (step)mom, only having lived with Olive for a few months. Oh, my goodness what a good big sister Olive was to Betty who certainly must have tried her patience. I think it is not only the people who were worse off without Olive when we lost her just a few weeks after Betty's first birthday, but Betty would have benefited so, so much had she had more time learning how to be a dog from an expert dog like Olive.


The dogs required us to put Ella the Cat's food on the counter. Ella was getting older so we put a stool near the counter for her to use to get up there. Betty learned that she could also use the stool to get up there, so the stool moved away from the counter, but close enough Ella could jump. A few times we would walk into the kitchen to find Betty on her "shame stool"!
Betty was super snugly from the time we brought her home until she got sick this spring.


Betty may have been inexpert at certain aspects of dogging, but I sure learned a lot from her. I learned patience and persistence - the former because of her skill at the latter. She could tell you again and again and again and again that you should kick this pine cone or ball for her to chase, each time as though she hadn't just asked/demanded. Sometimes I could wait her out, often not. She was passionate about her hobbies!


Grandma gave the Beastie Grrrlz large Chuck-its for Christmas 2015. I thought maybe this would mean Betty's fetch sessions would only require 2 balls - one to carry and one to chase - but, nope... she could still carry two of the big ones!


I learned about the joy in repetition and in the little things. Every time a pine cone was kicked it was a thrill to block it or chase it or pounce on it. EVERY. TIME. Of course, the same goes for fetching balls. Betty was a ball chasing maestra and a pleasure to watch run after them. She was so fast on her long, muscular legs that people would ask if she was part greyhound when we lived in Portland and went to the dog park every day.


Betty learned to be a water dog at the Thousand Acres park at the Sandy River Delta.


Sometimes a stick isn't enough, but to a dog their people are good enough even when they're filthy from remodeling a kitchen.

When she and Delia decided they could not stand each other, I learned about loving someone so much and so hard that I had no choice but to accept a catastrophic flaw.


I re-learned to be ready for the fun and funny unexpected things. Betty did not howl or bay really. This is the only time we can remember her doing it and we were just lucky that I happened to be filming the play session when it happened.


I learned that a nap with a dog was one of the best naps one could nap. I relearned how it was nice to hold hands on car rides. I learned it is just as much fun to make costumes for dogs as it is for people, in fact maybe it is more fun.


Captain Betty. This post on craftster.org got this project published in a Star Trek craft book - no doubt because of Betty's elegant good looks as the model.

So prim.

I never got a good photo of her in her completed hobo spider costume.

Luchadog! La Cazadora, The Huntress

I picked up this elf outfit for Betty at the after holiday clearance. I am glad I got a photo then.

I learned more about sharing and more about the joy in watching others that I love in the acts of
loving each other.

A snap Betty's Auntie Adrienne took of Betty with her cousin/best friend Wacho and her people-cousin, Kate playing in their yard.


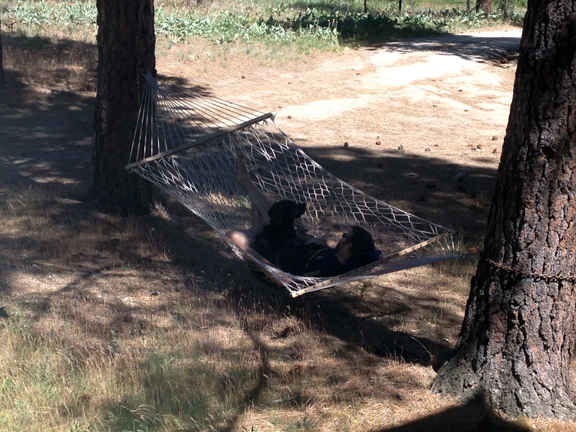
Getting up in that hammock with Eric was her idea and she managed it all on her own.

I have so many photos of Betty throwing herself at guests, but can't seem to find most of them. :(

Fathers Day 2016 walk in the National Forest.

I have already known the sorrow and deep pain of loss from pets dying and now I am learning it again. I love Betty. I miss her.


Wednesday, July 13, 2016

One Step at a Time: The Bathroom Redo Edition. Volume 5

Despite how it might sound, there is nothing sexy about caulking the shower. It's necessary, though and gives a nice clean-looking edge.

[ I had planned to insert a photo here, but then I was trying to take one and realized a photo of the caulk where the shower and the drywall meet is a dumb photo. ]

Number 4, part b: Because I am planning on installing Venetian plaster on the walls and I noticed that the shower sprinkles up a bit onto the walls above the fiberglass shower surround, I decided to add a row of tile. Luckily, my mom recently remodeled her bathrooms and was sent the wrong special order border tile that the supplier didn't want back. It happens to pretty much match the resin counter and is free so it's a go!

Yeah, the photo is blurry, but it's not blurry in real life unless you take your glasses off which is what both of us do in the shower. Usually.

It also doesn't show with the shower curtain up. Wink.

This is the better of the two household showers and it's been out of commission for a couple of weeks. Now the curtain is back up and we're ready to roll. YES!

Oops! I didn't get the box fan all the way out of the shot! How embarrassing. It was a very important tool for working on these bathroom projects in the summer.

And now back to those outdoor projects!

Downstairs Bathroom Redo Master List

1. Walls
   a. remove floral wallpaper & repair damage
   b. prime original wallpaper & skim coat
   c. prime skim coat and paint
   d. veneer plaster & topcoat
2. Ceiling
   a. skim out or remove popcorn texture
   b. remove some of the plant hooks?
   c. prime
   d. fun faux finish
3. Cabinetry
   a. sand
   b. pickle
   c. replace pulls and knobs
   d. add reclaimed, refinished wall shelves
4. Tub/Shower
   a. remove and replace caulk
   b. add tile "backsplash" above
   c. remove doors
   d. replace shower curtain
5. Move hardware
   a. train rack over toilet
   b. hand towel bar
6. Floor
   Not sure, but must deal with wrecked stuff beneath tub/shower
7. Window covering
   a. tba
8. Decorations
   a. on walls
   b. in shelving unit

Monday, July 11, 2016

One Step at a Time: The Bathroom Redo Edition. Volume 4

There are just a couple-few small projects on the downstairs bathroom to accomplish this summer with the rest of them happening at some undecided time in the future. But I want the bathroom to stop having that in-progress feeling it has had for so, so long. To that end, the hardware & decorations have started to go up!

We brought down a mirror from the bedroom to replace the cheap/thin one that came with the place that was installed lower than either of our heads. The frame is old and warped which gives the mirror a bit of a fun house quality, but it turns our that neither of us care! We've plenty of other "accurate" mirrors in the joint.

I've had this mirror for probably 12-15 years and in five houses. The frame is a little grungy so I'll probably refinish it eventually.
I have had those empty frames for a long, long time and haven't had them up in several years so it was nice to have a good place for them. My mom gave me the cast aluminum stag hooks and they work great in here! It will be fun to find small trinkets to hang on the hooks.

I moved the the train rack to over the toilet to accommodate a wall-mounted shelf near where it used to hang. Now that the walls are painted, the cloth basket I made for towel storage makes more sense, as does the shower curtain.

I found this candle vase to use for stowing an extra couple rolls of toilet paper near the toilet itself. The vanity cabinet is just far enough away that it's hard to reach while seated (ahem) and it's always frustrating to not notice the roll is out of paper until you need it*.

Since other pieces of hardware have moved it made sense to reinstall the towel bar on the wall to the left of the sink. I don't feel like there was a just-right spot for both convenience and aesthetics, so it went here. Whatevs. Just so long as we and our very occasional guests* have access to a clean towel for drying our and their hands. Besides, when I repair and hang the decoration I have to hang above it, I think it will look fine.

So yeah. I have a thing where I don't want totally matching towels. That is, I want them to match the decor, but not necessarily each other perfectly and all the time. It's not for everyone.

I saved a shelf that I took out of the laundry room to paint in what was probably the first week we lived here. It will be refinished inside and out when I do the rest of the cabinetry. It's going on the wall stocked with tchotchkes, knick knacks, and doo dads. I have been collecting them and decorations for the walls via gift and purchase for a long, long time. Hopefully, I'll get the shelf refinished and all the stuff up in the next month or so, but I'm not going to sweat it if I don't.


* It's always a little embarrassing to be a guest when there's no obviously available hand towel or back up toilet paper.

Downstairs Bathroom Redo Master List
1. Walls
   a. remove floral wallpaper & repair damage
   b. prime original wallpaper & skim coat
   c. prime skim coat and paint
   d. veneer plaster & topcoat
2. Ceiling
   a. skim out or remove popcorn texture
   b. remove some of the plant hooks?
   c. prime
   d. fun faux finish
3. Cabinetry
   a. sand
   b. pickle
   c. replace pulls and knobs
   d. add reclaimed, refinished wall shelves
4. Tub/Shower
   a. remove and replace caulk
   b. add tile "backsplash" above
   c. remove doors
   d. replace shower curtain
5. Move hardware
   a. train rack over toilet
   b. hand towel bar
6. Floor
   Not sure, but must deal with wrecked stuff beneath tub/shower
7. Window covering
   a. tba
8. Decorations
   a. on walls
   b. in shelving unit


Friday, July 8, 2016

One Step at a Time: Kitchen Edition, Done Enough For Now

It's been a few weeks. We had a house guest and some other priorities, so kitchen projects were done piecemeal. Not to mention I really just took my time glazing and especially varmishing the "brick" beneath the wood stove and fitting in a few other projects in the main bathroom. Now I'll take a break from this to work on other things around the property before starting Phase II, but I will probably work on some decorations and such here and there. 

Just about every surface except the floor was refinished or replaced and nearly all the hardware and fixtures, too. Dudes. Here are the after panorama shots of each side! I'll put before shots at the bottom of the post.


The last Four weeks' projects are all on the fireside of the room and the last of the kitchen projects for a while.

1. Do something with that terrible brick veneer and shelf.

At the time of the last post, the brick veneer had been repaired and primed. It has now been glazed and varnished! Whew! What a change in the room to be rid of those dirty, red, brick-bastards!


I searched around the internet for images of grey bricks to find some examples to semi-replicate using various glazes. Even though I know better to just go at a surface without making a sample board and I did intend to make a sample board I did not actually make a sample board. Sooooo, this took longer than expected, but still with some days to start curing before Renaissance Handyman Nick cuts and installs our replace shelves on the top.

If you look, you can see that the new grey switches and outlets now have their plates! I also removed the land line port (socket? outlet?) and replaced it with a blank cover painted and glazed to match the brick veneer.

I still have the base part to do, but wanted to wait until the shelf was installed so we'll won't not be walking on it for a good while. Renaissance Handyman Nick got the shelf up in pretty short order! I had pre-finished the kiln-dried, fir 4x4s that just needed a bit of touching up here and there after the cutting, screwing, and nailing. I still have to touch up the paint where these projects marked it up a little.

I was so excited about the shelf that I couldn't wait for the base bricks to be done to get another panoramic shot!

2. Install picture rail.

I waffled back and forth about whether I should install this or not. I wasn't looking to add a contrasting color where the planes of the wall and ceiling meet - that could do the same thing that all the wallpaper borders did around here: make the ceiling seem even lower. BUT this hall gets various seasonal and holiday decorations and I a) was tired of hanging them haphazardly on just available nails and b) didn't want to put a bunch of holes in the walls to accommodate each season. This is pretty much the same reason I chose the picture rail profile for the crown I added to the upper cabinets. AND I just could not get excited about painting them to match the walls and ceiling. Finishing them to match the cabinets seemed a bit like Garanimals-style decorating.

You'll note that the picture rail stops short of the end of the wall. I still hate that corner where the beam and post come together and have that weird and weirdly finished drywall. I have some ideas for dealing with that brewing in my noggin.

I think that this photograph of Mount Hood will be the main occupant of the space. It had been in the kitchen before and came from my grandmother's house. I believe she got it from her parents or perhaps paternal grandparents.

I need to scour the house for appropriate tchotchkes. I can not wait to see the stockings hung with care this winter! I noticed in the photos of the stockings you can see the ugly old phone jack. And what do you know, it was crooked to boot! 

I think we'll have rotating and seasonal knick knacks, doodads, and tchotchkes on the shelf under these great silver, resin antlers I got for my birthday!

Look at all the line-thrus! YAHOO! But of course, the original list begat another list (see below).

The original list of the order I thought the projects will happen. Line through for complete items, italics for additions. I'll let myself do partial line throughs for partial completion, because it's good for my morale. And brown-out for items moved to Phase II.

1. Light fixtures
2. Remove corner shelf in order to...
3. Remove wallpaper and repair walls (& ceiling) as necessary, get temp solution for backsplash
4. Paint walls above cabinets, around wood stove, paint laundry/bath hallway.
5. Cabinet repair, move, modify
6. Refinish cabinets
8. Level, repair, and refinish counter tops
11. New sink and faucet and the counter modifications that go with it.
10. Replace outlets, switches, plates in backsplash.
9. Install backsplash, probably tile
12. New refrigerator surface to replace old new refrigerator surface.
16. Replace light switch and plate in hallway.
14. Replace outlets, switches, plates by wood stove.
15. Paint wood stove and stovepipe. 
7. Maybe try to do something with that terrible brick veneer wood stove surround and shelf?
13. Build a door of some sort for that too-big hole for the microwave & deal with the inside.
17. Install picture rail in hallway and that one wall behind the wood stove for now.

PHASE II


Of course, that's supposed to be "... rest of stovepipe" but hey. it's my list on my phone and I know what I mean. I'm obviously no stranger to typos! Also, we've decided to continue the picture rail around the kitchen.


Tuesday, July 5, 2016

One Step at a Time: The Bathroom Redo Edition. Volume 3

Soooo, I started this "one step at at time" thing well over a year ago when I started doing small projects in the downstairs bathroom. Then I hit a really yucky roadblock, got discouraged, and quit. Now that the kitchen is almost done-enough, I am going to try to tackle a couple of the bathroom redecoration project between the exterior and yard projects.

I am one mini-project away from being done-enough with the kitchen. That post should come out w/in a week!


What we had already changed:
TP holder & towel bar, cabinet hardware, window coverings, that spider plant they left here was taken to Eric's office, shower doors removed, wallpaper mostly removed.

1. Remove Wallpaper, Refinish Walls

EXTENUATING CIRCUMSTANCES

The yucky roadblock mentioned above was that under the blue and pink floral wallpaper was another layer of primed wallpaper and that wallpaper was attached directly to the drywall... which I didn't know until I'd removed a bit of it and mangled the drywall paper in that area. As luck would have it that area was right beside the toilet. That's not so much a structural issue as it is a non-logical, gross-out issue. It looks like something untoward happened with the toilet. Blech.


Not only did I need to repair that, I had to prime over the original wallpaper, skim coat the walls to cover the seams along with wall repairs , prime that skim coat and then paint. Wall repairs include some big old anchor holes and the classic doorknob-through-the-wall hole that was originally "repaired" with something gummy and flexible. Based on the texture AND the color, I think it's just a giant glob of the wallpaper seam sealer the last owners were so fond of.

I use a "paper tiger", a homeowner-grade steamer, and a painters tool or wide putty knife to get the paper off. Also, creative cursing.

I decided to remove down to the most recent wallpaper's backing paper, because anything further was causing enough damage to just increase my work load later on. It already looks like the ceiling is quite a bit taller!

Post wallpaper removal, pre-oil-based primer.

The next step was to prime with oil-based primer before making repairs. After that, I repaired all the anchor holes and the door knob damage as well as filled nail holes. When those were dry, I skim coated all the walls. One of the bummers of this part of this kind of project is that each of these last three steps leaves the walls looking pretty much the same if you're just glancing around the room. Removing the wallpaper and skim coating are also time-consuming and boring. At least the priming was quick!

Post-oil-based primer and post-skim coat
The result of the skim coat is far from perfect, but will work well-enough as a base for the plaster veneer finish I want to do eventually and is a big improvement over the wallpaper. After that... ANOTHER coat of primer, this time water-based which means less stinky and easy clean up. But it also means another process that doesn't leave the walls looking all that different. Sigh.

Post- water-based primer. You can see how these processes could be a bit challenging morale-wise.

FINALLY some immediately obvious results from my efforts!... a sea glass-inspired wall color! This time it's Benjamin Moore 2049-60 Forget Me Not.

OK, OK! It's a lot more dramatic and noticeable in real life!

Once I pull the tape, do some touching up, and catch my breath, I'll reinstall all the hardware and put in a different mirror! YAHOO!


2. Deal with painted-over popcorn ceiling.

My hope is that in the next autumn or winter I can take care of all this. I have further plans for finishing the walls, but I want to take out or skim coat over the only popcorn ceiling in the house before I do much else to the walls.

The ceiling seems white-ish until you start looking closely and noticing the holidays in the paint which are actually white-ish. Then you notice the ceiling is some kind of light-ish pinky orange. Sigh and "why"? And sigh again.

But the ceiling is a project for a different time.


Downstairs Bathroom Redo Master List
1. Walls
   a. remove floral wallpaper & repair damage
   b. prime original wallpaper & skim coat
   c. prime skim coat and paint
   d. veneer plaster & topcoat
2. Ceiling
   a. skim out or remove popcorn texture
   b. remove some of the plant hooks?
   c. prime
   d. fun faux finish
3. Cabinetry
   a. sand
   b. pickle
   c. replace pulls and knobs
   d. add reclaimed, refinished wall shelves
4. Tub/Shower
   a. remove and replace caulk
   b. add tile "backsplash" above
   c. remove doors
   d. replace shower curtain
5. Move hardware
   a. train rack over toilet
   b. hand towel bar
6. Floor
   Not sure, but must deal with wrecked stuff beneath tub/shower
7. Window covering
   a. tba
8. Decorations
   a. on walls
   b. in shelving unit


Friday, July 1, 2016

This & That Projects; Out of Doors, Y'all: 2

Last year I took down the old, sagging clotheslines and painted the posts. This year we had Renaissance Handyman Nick drill holes so we could use eye bolts for the new lines instead of wrapping them around which I waited too long to schedule, so it just happened last week.

Our underpants have a pretty decent few of the National Forest while they dry.

Then I couldn't get enough 1/4" x 3" eye bolts to do the trick even after shopping 3 different stores, but I finally got all the hardware together and have my clothesline back!

Don't be fooled by this paltry display, I can fill all nearly 100' of line and not infrequently.

Annnnnd, I finally made a clothespin holder. I started looking for ideas and patterns before we even actually moved, so... this is FOUR YEARS in the making. Yeah. At least I had all the materials on hand and finally got to use this fun "flour" sack I picked up at a thrift store for a few cents something like a decade ago.


I decided to go apron style instead of the hanging-bag style and I think it was the right choice for me.

The link on this pin is dead, but the image has measurements so I was able to make a pattern and wing it on assembly.


Fire season has started, but we're not smoky here yet, so here's hoping we'll get some loads done before the break for smoke season. Or better yet, let's all hope for a quiet fire season this year for everyone for reasons much more important than drying laundry on the line.


Tuesday, June 28, 2016

This & That Projects; Out of Doors, Y'all: 1

Now that the kitchen is alllllmost done-enough and we're legitimately into summer, I am trying to accomplish several smaller outdoor projects.

First up! Painting the exterior trim work around the windows and possibly the doors. Did I remember to take before photos specifically for this? I did not. Here's a generic before photo for a cold, distant reference.


[ here I was going to put a photo of the whole house to show how it looked before the trim paint, but it turns out that when I take a picture from the yard you can't tell much of a difference between the before and after looks. Huh. ]

I chose a green similar to one of the couple-three lichens/mosses we have around the property. It's less yellow to better coordinate with the siding. Benjamin Moore Regal Select Exterior, HC-119 Kittery Point Green, low lustre finish.


Since the two large picture windows on the front of the house and a couple of the windows in the mudroom (which is an amateurishly enclosed porch) are white vinyl and the rest of the windows are white-painted wood I decided to leave the windows themselves white and just paint the moulding.

I'm going to be straight with you and say that from a distance, i.e. in the yard, you can't see much of a difference. Partly because the first floor is half a story off the ground and there's deck railing in the way to boot.

Among the project for later this summer are making the front door higher, so we can use a door mat inside (right?) and making the exterior door in the mudroom (described above) closer to airtight... well mostly we're going for rodent tight. Yeah. Ugh. Renaissance Handyman Nick is on tap for that project and when those are done there will be some repaint magic going on those, too.


STATUS: Five of the eleven windows are done! Balcony door trim has been done, too. It's Benjamin Moore Regal Select Exterior, HC-166 Kendall Charcoal, low lustre finish.